
 888-825-8800


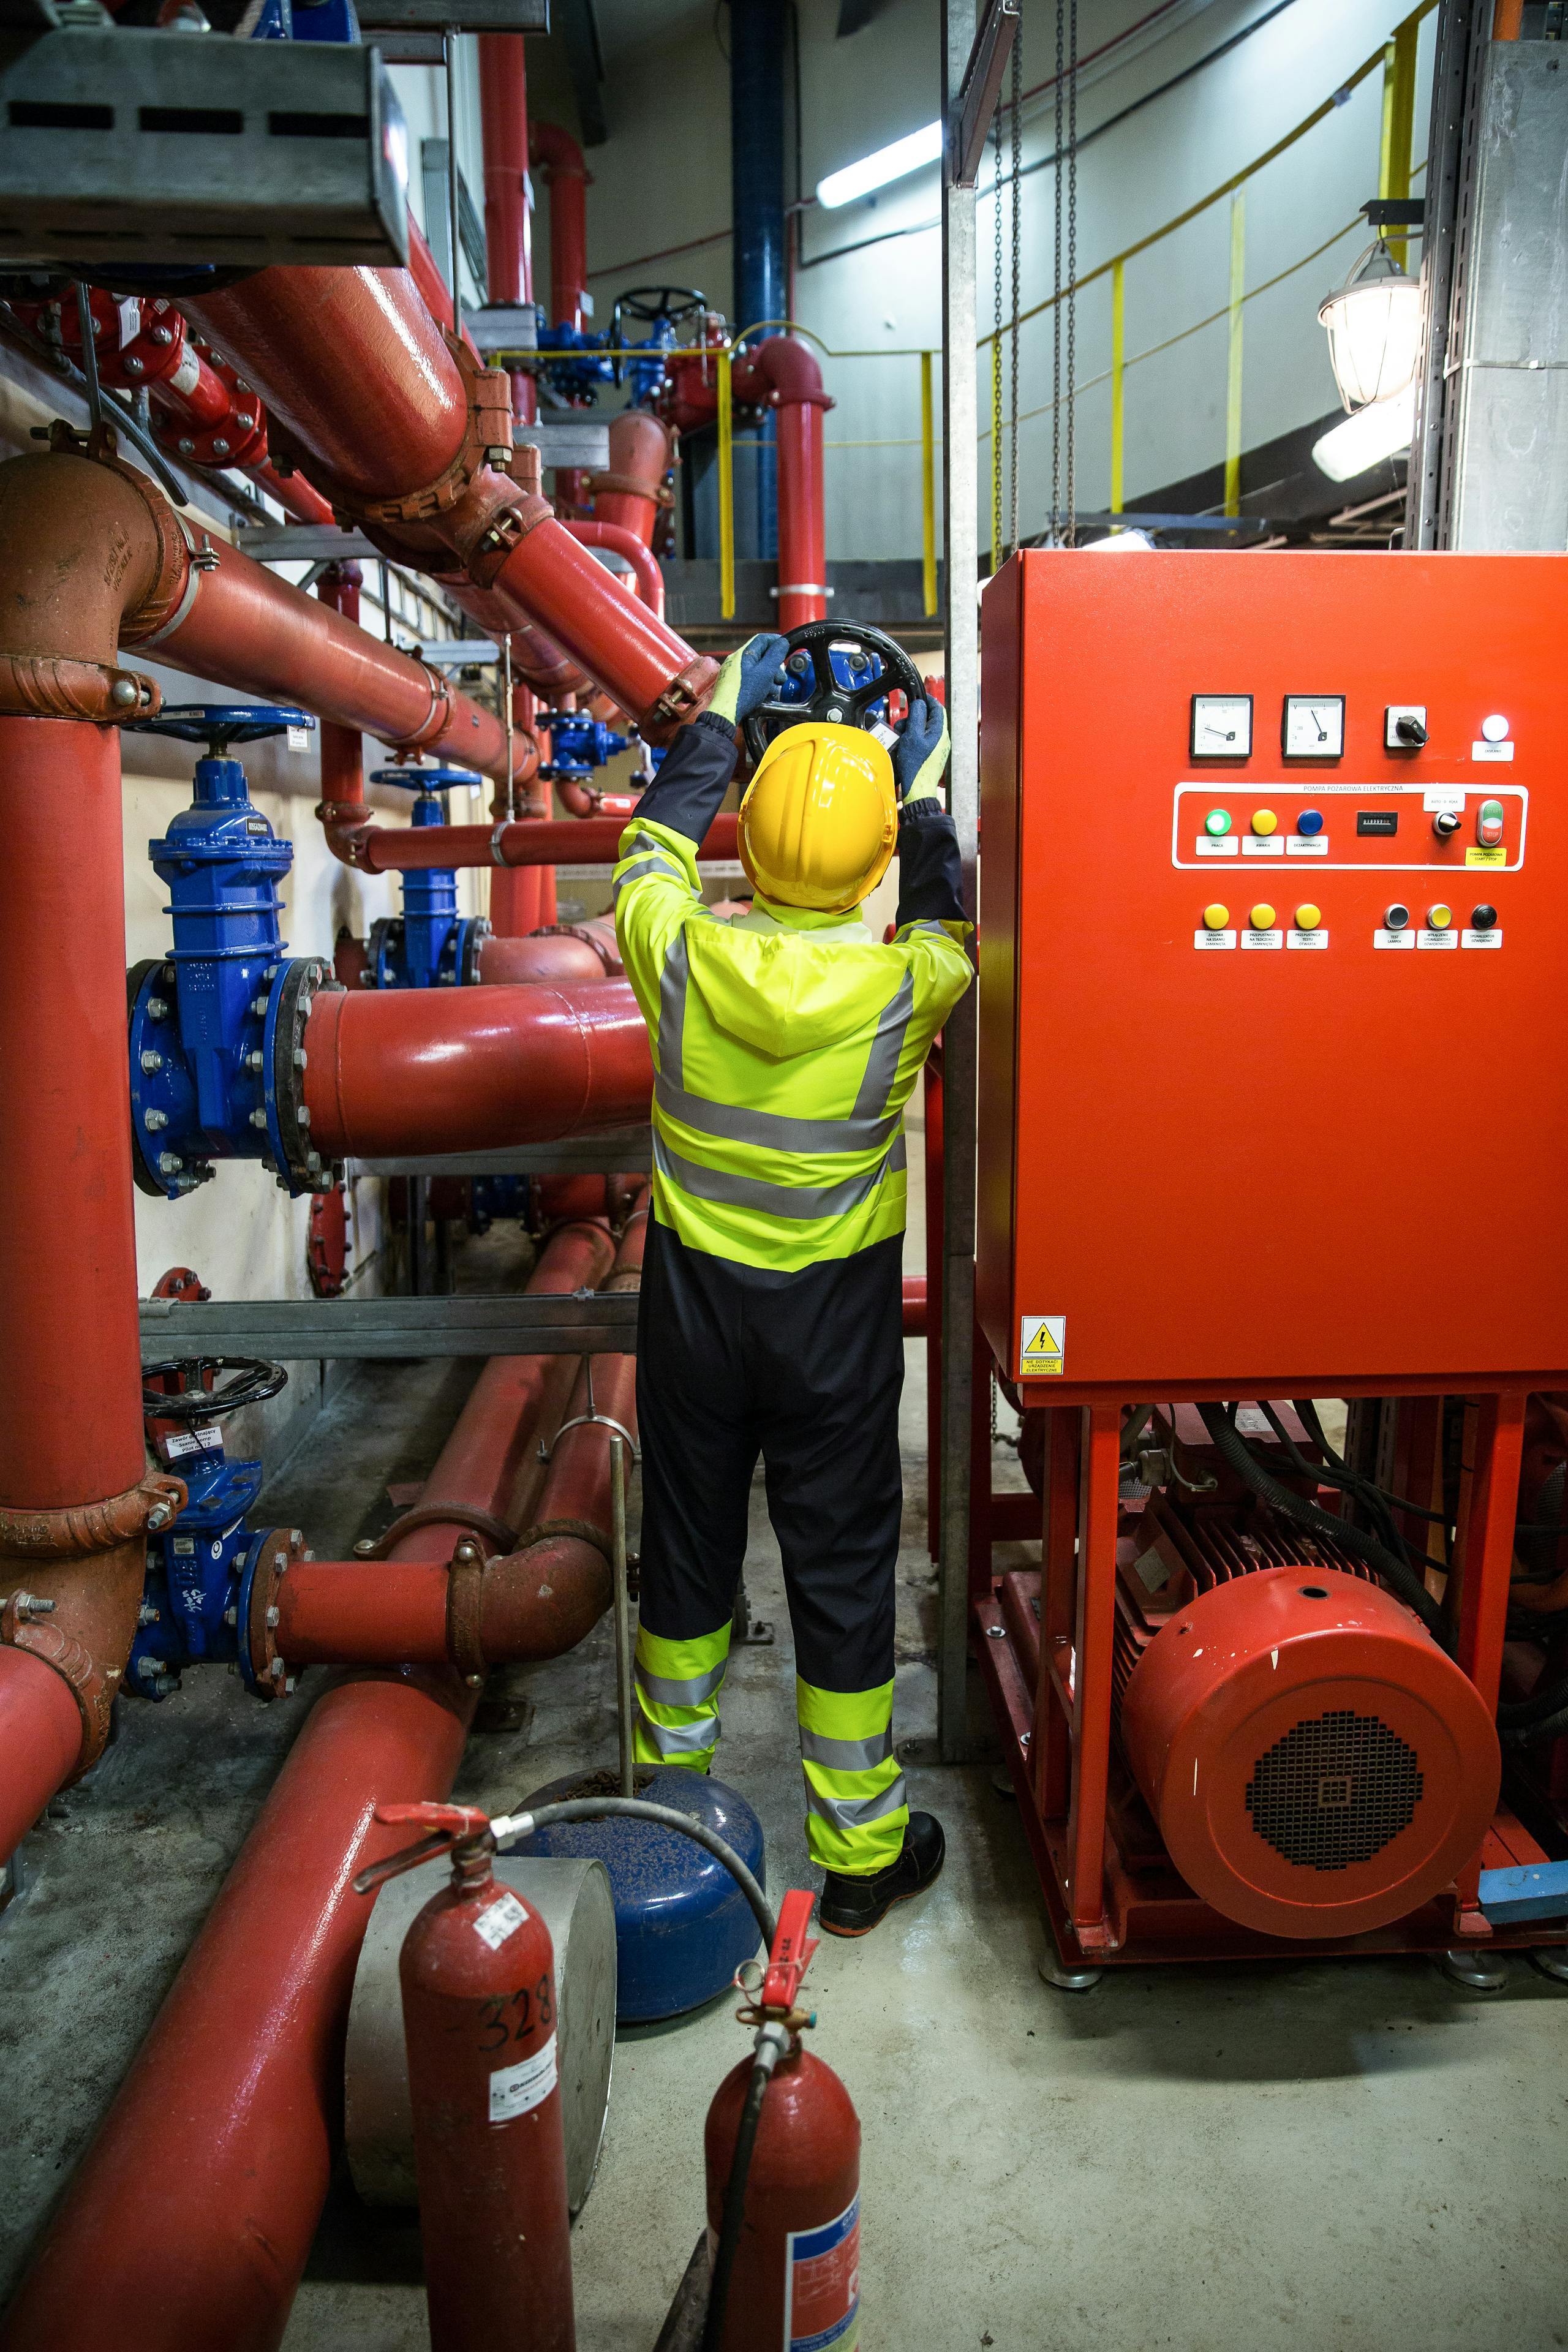
Valve Maintenance Best Practice Guide
Posted by Mark Trainer on Dec 19th 2025
A Guide to Safer, Long Lasting Valves
Valves are found in most piped systems that move liquids, gas, and steam. From industrial plants processing chemicals to municipal water networks delivering clean drinking water, valves control fluid flow in countless applications. As industrial systems become more complex and sustainability features more prominently, the importance of maintaining valves is clear.
Valve failures account for a significant share of downtime across oil and gas, chemical processing, food and beverage, and pharmaceutical sectors. Aside from downtime, leaks at valves and fittings may waste up to 20% of pumped fluids annually. This can translate to revenue loss, safety incidents, and regulatory non-compliance.
Routine valve maintenance prevents major issues by identifying problems before they escalate. A small leak today can become a catastrophic failure in the future. Fluid leakage, worn-out seals, and corroded valve components are all detectable during regular inspections.
It's worth highlighting that, no matter the type of valve, high-quality and durable valves perform better, last longer, and help reduce upfront, operating, and maintenance costs.
This guide is aimed at technicians, operators, and facility managers who are new to the basics of industrial valve maintenance. Whether you’re responsible for a building's utilities or an entire processing facility, understanding these fundamentals will help you establish a valve maintenance program that protects your equipment and people.
Benefits of Regular Valve Maintenance
Proper valve maintenance pays off in the long run, ensuring proper valve operation and optimal performance of valve components. Here’s what you gain by prioritizing valve care.
Reliable Systems: Every valve has parts that wear over time. Valve seats erode, valve stems develop play, valve seals become brittle, and internal components accumulate deposits or corrode. Regular maintenance helps identify these issues before they cause a valve failure and a potential unplanned shutdown.
Extended Service Life: Properly maintained, quality industrial valves can last over 20 years, whereas cheap and neglected equipment can last anywhere between 1 and 5 years. While this is also heavily dependent on the valve spec and operating conditions, proactive valve care reduces costly valve replacement and downtime, stretching your budget further.
Enhanced Safety: Valves in high-pressure service, or those handling hazardous fluids, pose significant risks if they fail. For example, a stuck pressure relief valve can lead to system overpressure and pipe bursts. A leaking shut-off valve can expose workers to toxic substances. Verifying valve operation through regular inspection and testing helps to protect workers, assets, and the environment.
Environmental and Compliance Benefits: Regulatory frameworks like the EPA Leak Detection and Repair (LDAR) mandate requirements for controlling fugitive emissions. Well maintained valves help you comply with requirements. Beyond compliance, preventing fluid leaks protects people and the environment, including water sources, soil, and air quality.
Cost Savings: Planned maintenance costs a fraction of emergency repairs or fast-track replacements. A scheduled valve service might require a few hours of technician time and minimal consumable usage, all during normal working hours. An emergency shutdown due to a valve failure can halt production for days, might require expedited valve or parts shipping, and demand overtime labor. Industry estimates suggest that preventive maintenance delivers around 40% cost savings, compared to reactive approaches.
In case you're wondering, we’d pick fall as the perfect time for annual valve maintenance.
Types of Valves and Their Basic Maintenance Needs
Different types of valves each require slightly different care. However, many inspection principles are general and shared across valve types. These include visual checks, operational testing, and proper documentation. Understanding what makes each valve type unique helps you prioritize maintenance activities accordingly.
Gate Valves
A gate valve uses a rising wedge or parallel slide valve disk mechanism to provide full flow or complete shutoff. These valves are common in water systems, steam lines, and industrial isolation service. Maintenance priorities include lubricating gate valve stem threads, adjusting valve packing to prevent leakage around the stem, and exercising the valve periodically to prevent the wedge from seizing in position. Check the manufacturer's documentation for specific torque values and lubrication intervals.
Globe Valves
A globe valve excels at flow control and throttling applications, where you need to regulate rather than simply start or stop fluid flow. The valve disk, also called a plug, moves up and down against a valve seat to control flow rate. Key maintenance activities include inspecting the bonnet for signs of leakage, checking seats for erosion, and verifying that the valve seals properly. These valves see more wear than isolation valves because they operate in partially open positions, and are often subjected to high velocity fluid flow through the valve.
Ball Valves
A ball valve uses a rotating ball element with a bore through its center to provide quick, quarter-turn valve operation. They’re popular for on/off applications in oil and gas, water, and chemical applications. Ball valves benefit from regular cycling to prevent the ball from sticking to the seats, periodic cleaning to remove debris, and inspection of seats for wear. The valve interior should be checked for any sediment buildup that could impair perfect valve closure.
Butterfly Valves
A butterfly valve features a rotating disk mounted on a shaft located in the fluid flow stream. Butterfly valves are compact shut-off valves and offer economical solutions for large pipe sizes. Maintenance focuses on inspecting the disk for wear or damage, checking the seat condition, and verifying lever or actuator operation. In slurry or abrasive service, more frequent inspections are necessary.
Check Valves
A check valve prevents reverse flow automatically, with no external actuation required. Depending on the type of check valve, maintenance may include inspecting the moving disc hinge pin, shafts, or springs for wear; cleaning internal passages of debris to prevent fluid blockage, and testing that the valve closes fully under reverse flow conditions. A check valve that fails in an open position can allow backflow that damages equipment or contaminates upstream systems.
Diaphragm Valves
A diaphragm valve uses a flexible diaphragm or membrane to control fluid flow, making it ideal for corrosive fluids and sanitary applications, as the diaphragm isolates the valve mechanism from the fluid. When troubleshooting diaphragm valves, the diaphragm is the primary wear component and should be inspected for cracks, hardening, or chemical attack. For severe service or demanding applications, make sure to specify suitably rated diaphragm valves from the outset.
Pressure Relief Valves and Safety Valves
A pressure relief valve protects equipment and systems from high pressure by opening automatically to relieve excess pressure above a preset pressure setpoint. Similarly, a safety valve guards against dangerous overpressure conditions. These valves require careful documentation of setpoints, regular testing to verify that they open and seal at the correct pressure, and inspection of the valve spring and seat. When troubleshooting pressure relief valves, verify that fluid operating pressure matches nameplate ratings and check for any debris that might prevent proper seating. For critical applications, simulated high-pressure testing should be conducted to verify that safety valves reduce fluid pressure when they are really needed.
Valve Maintenance Checklist: Step-By-Step Overview
A valve inspection and maintenance checklist serves an important role in establishing an effective valve maintenance program. The high-level outline below can be adapted into standard operating procedures tailored to your specific industry, process area, or based on valve type. We've also developed a valve maintenance checklist, which you can bring along to your next valve walkdown.
| Task | Description |
|
1. Preparation and Lockout/Tagout |
Isolate the valve from the piping system, depressurize, and apply the appropriate lockout and safe work procedures. Verify zero energy state before beginning work. |
|
2. Visual Inspection |
Examine the valve body, valve bonnet and end connections for signs of corrosion, cracking, coating damage, and visible leakage. |
|
3. Functional Check |
Operate the valve through its full range of motion. Note the ease of operation, any unusual noise, and whether the open/close indication matches actual valve position. |
|
4. Cleaning |
Remove dirt, scale, and product buildup from external surfaces. For disassembled valves, clean seats, stems, and valve internal components. |
|
5. Lubrication |
Apply manufacturer recommended lubricant to stems, gearboxes, and actuator linkages. Avoid over lubrication. |
|
6. Seal and Packing Replacement |
Replace valve gaskets, valve packing, seals, or O-rings as needed. Use OEM-approved materials compatible with the valve service. |
|
7. Reassembly |
Refurbish components where necessary, and reinstall components as per manufacturer specifications. Use proper bolting sequences for body to bonnet connecting bolts and flange connections. |
|
8. Final Testing |
Verify operation under system conditions. Conduct valve performance and leak tests as required. Document all test results. |
Each task should include recording the valve ID or tag number, date, technician name, observations, repairs performed, and next due date for maintenance. Valves may be grouped by process or site location to help streamline inspections.
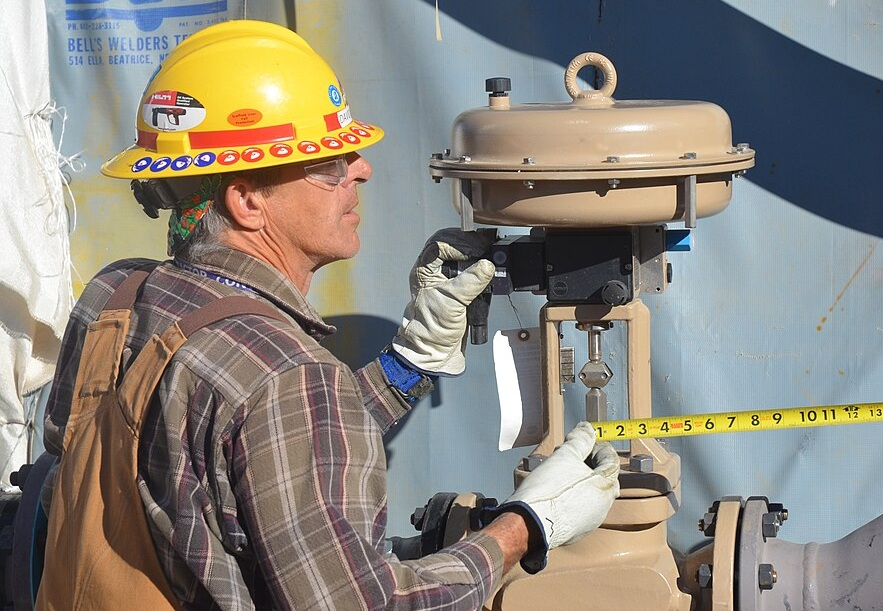
Inspecting Valves and What to Lookout For
Careful and thorough inspection is the starting point of valve maintenance. Regular valve inspection and monitoring helps identify problems early, while they’re still manageable, rather than after a failure has occurred.
External Valve Inspection Points
Start with the valve body and valve bonnet, looking for signs of corrosion, cracks, or pitting, and coating damage. Check flange faces and end connections for leaks or seepage, noting that even minor weeping can indicate a seal problem that may worsen over time. Examine the packing or mechanical seals for visible leakage, which signals that adjustment or replacement is required. Check the valve body and external flange connecting bolts for signs of corrosion or loosening.
Valve Operational Inspections
Cycle the valve through its full range of travel while observing and 'feeling' the valve actuator or handwheel. Note ease of operation: the application of excessive force or actuator 'sticking' suggests internal binding, seizing, or lack of lubrication. Verify that position indicators accurately reflect valve position and check for any unusual noise or vibration during operation. Ideally, the valve should move smoothly throughout its operating range, including opening and closing.
Control and Relief Valve Inspections
For control and relief valves, verify that tags and nameplates are legible and that setpoints are documented on the valves and in the operating instructions. Compare position indicators against control system readings to identify any discrepancies. Verify pressure readings upstream and downstream of control valves. Unexpected pressure readings must be noted and investigated further, as they may be indicative of problems with a valve.
Valve Inspection Tools and Techniques
Good lighting is essential when inspecting valves. Carry a flashlight for dark areas or confined spaces with restricted lighting. Mirrors help inspect areas that are normally outside one's visibility. For critical valves in high-pressure or hazardous service, routine non-destructive testing, such as ultrasonic thickness testing, may be used to monitor internal corrosion. Follow your plant or organizational standards for testing frequency and reporting requirements.
Cleaning Valves
The presence of dirt and impurities, corrosion byproducts, scaling, and buildup of debris and sediment may impair valve movement, damage sealing surfaces, and foul instrumentation. Regular valve cleaning maintains optimal performance and extends component life. However, incorrect cleaning methods may inadvertently damage the valve or compromise your system.
External Valve Cleaning
For routine external cleaning, wipe surfaces with clean rags to remove dust and grime. Use nylon or soft brass wire brushes for stubborn deposits, taking care not to damage protective coatings or scratch polished surfaces. Avoid removing, obscuring, or damaging identification tags during cleaning. Exercise caution when cleaning end connections, and make sure not to introduce any foreign or harmful substances that might enter the valve or pipework.
Internal Valve Cleaning
When a valve is removed from service for repairs or refurbishment, take the opportunity to clean all internal components thoroughly. Brush seats and valve disc surfaces to remove any deposits. For ball valves, clean the valve ball and seat pockets. Flush small passages to remove debris that could prevent fluid flowing effectively. Remove mineral scale or rust that could impair valve operation.
Cleaning Solution Guidelines
Never use harsh chemicals or abrasive cleaning methods that may erode soft seats, damage valve coatings, or degrade elastomers. When cleaning plug valves or valves with delicate trim, be especially careful. Always follow the valve manufacturer's data sheets for approved cleaning agents. For example, using the wrong solvent on a Viton seal may cause swelling, embrittlement or degradation (depending on the solvent used) and lead to premature seal failure.
| Contaminant Type | Recommended Solution |
|
General grime |
Mild detergent and water |
|
Mineral deposits |
Vinegar or approved descaling products |
|
Hydrocarbon/oil residue |
Manufacturer-approved solvents |
|
Biological fouling |
Sanitizing solutions per industry standards |
Valve Lubrication
Lubrication may be required along the valve stem, at the stem threads, at bearings or bushings, and at gearboxes or actuators. In certain valves, such as some plug valves, lubricant may also be required to provide a sealant film along the valve seats. Follow manufacturer guidelines when lubricating valves, as both over-lubrication and under-lubrication can cause problems. Too little lubricant leads to friction, excess wear, and sticking. Too much lubricant attracts contaminants and may even contaminate process fluid. Manufacturer-approved lubricants should be used to ensure optimal performance.
Valve Components Requiring Lubrication
- Valve stems, including stem threads, bushings, and bearings
- Gearboxes on large valves
- Actuator linkages and bearings
- Plug or ball surfaces, seating surfaces (on some valve designs)
- Handwheel threads and bearings
Selecting the Right Valve Lubricant
Consider the following when selecting valve lubricants.
| Factor | Consideration |
|
Lubricant type |
Based on original design and OEM instructions. Guides whether oil, grease, hydraulic fluid, etc. is required. |
|
Process compatibility |
Lubricant must not contaminate the process fluid |
|
Temperature range |
High temperature service requires appropriate lubricant grade |
|
Pressure rating |
Some lubricants may break down under high fluid pressure |
|
Elastomer compatibility |
Generic oils and greases may damage valve seals |
Valve Lubrication Intervals
Base valve lubrication intervals on manufacturer recommendations, criticality of service, and operational conditions. Operational conditions would include hours of operation, number of cycles, and environmental exposure. Outdoor coastal installations face salt air and humidity that demand more frequent attention than indoor clean room environments. High-cycle valves (more than 10,000 operations per year) need monthly lubrication checks, while standard duty non-critical valves may only need an annual service. Be sure to consult OEM documentation, such as operation and maintenance (O&M) manuals for guidance.
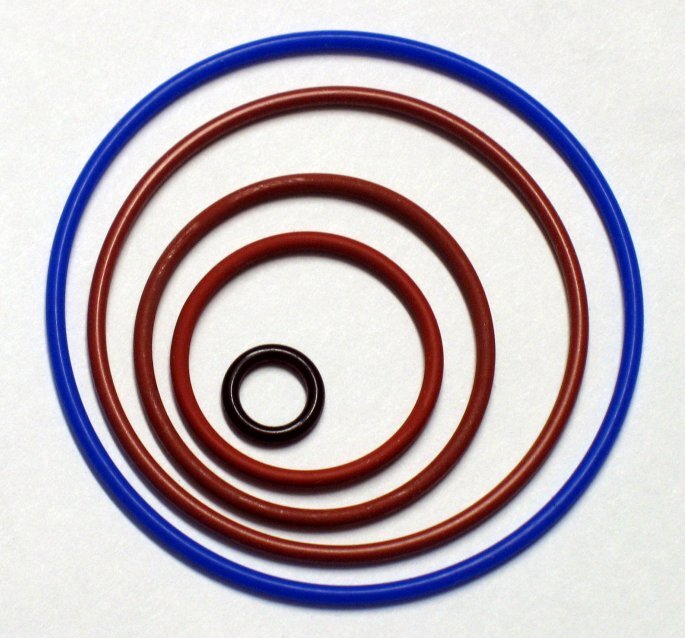
Replacing Valve Seals, Gaskets, and Packing
Seals, gaskets, O-rings, and packing materials wear over time, especially under heat, chemical exposure, frequent cycling, and vibrations. Replacing worn out seals before they fail prevents unplanned downtime and potential fluid leakage. Signs of seal failure include:
- Weeping or dripping at valve bonnet connections or at valve end connections
- Visible leakage around the valve stem (packing failure)
- Pressure drop across the valve when closed
- Stains or residue around body joints
Corrosive fluids accelerate seal degradation, so depending on material compatibility, valves in aggressive chemical service may require more frequent seal inspections than those handling clean water.
Replacement Procedure
- Isolate and depressurize the pipe section and valve completely.
- Remove the valve from the line, and transport it to the workshop for further inspection, valve service, or refurbishment.
- Remove old packing, gaskets, or seals.
- Clean grooves, stuffing boxes, and sealing surfaces as required.
- Inspect mating surfaces for signs of wear or damage.
- Inspect bearings, gearboxes, and actuators as required.
- Install new OEM-approved components.
- Re-assemble the valve; be sure to tighten to specified torque values.
- Test for leaks before returning to service
Common Valve Seal Materials
Here are some common valve seal materials that are used for different applications.
|
Seal Material |
Typical Applications |
|
PTFE (Teflon) |
Chemical service, low friction, wide temperature tolerance |
|
Graphite |
High temperature, high pressure, steam service |
|
EPDM |
Water, steam, mild chemicals, HVAC |
|
Viton |
High-performance, high-temperature chemicals, oils, and fuel |
|
Nitrile (NBR) |
Petroleum products, hydraulic fluids |
Replacement seals, gaskets, and packing must be compatible with the fluid, temperature, process, and regulatory requirements. For potable water systems, verify compliance with NSF/ANSI 61. Replacing worn out seals with the correct materials is essential to prevent fluid leakage and ensure proper valve sealing.
Valve Installation and Alignment
Errors in valve installation and alignment are often the root cause of early valve failure, especially in high pressure and high temperature service. Insufficient support at or near valves may also contribute to premature valve failure. Even the best maintenance program won't overcome these fundamental design and installation problems.
Flow Direction and Valve Orientation
Before installing a valve or tightening any bolts, confirm flow direction using body arrows cast on the valve body, cross-check flow against piping and instrumentation diagrams (P&IDs), and verify against installation manuals. Installing a check valve backward may have disastrous consequences. Other valves, such as butterfly valves and globe valves, may have preferred flow directions for optimal valve operation. Most safety / relief valves, certain check valves, pilot operated solenoid valves, and large isolation and control valves may not be suited to vertical installations. Be sure to verify suitability with the valve manufacturer or supplier.
Valve and Pipe Support Requirements
External forces and loads should not be transferred to the valve body. This includes static loads caused by the weight of the piping and fluid, piping thermal expansion loads, and dynamic loads caused by wind, seismic activity or transient effects. Misaligned piping may also transfer loads onto valves.
Proper pipe support design and placement protects valves from external loads. Improper pipe support may result in distorted valve bodies, damaged seats, and may prevent proper valve closure and sealing. Install adequate pipe supports on both sides of the valve and verify that piping aligns with valve flanges without being forced in place.
Flange Bolting Practices
Proper flange bolting helps to prevent internal fluid leakage, ensure even sealing, and maintain smooth operation within the pipe system. Follow these tips:
- Tighten bolts in a star pattern to distribute load evenly
- Use calibrated torque wrenches
- Select the correct gasket type and size for the service
- Verify that gasket is centered before tightening
- Retorque after initial pressurization (if required by your procedure)
Valve Actuator Alignment
Verify valve actuator alignment and travel limits after installation. The actuator should move the valve through its full stroke without any binding. Confirm that limit switches and position feedback match the actual valve position. Revised system characteristics, for example, due to increased inlet or discharge pipe resistance, may require actuator fine-tuning.
Training, Documentation, and Continuous Improvement
Even the best maintenance programs and checklists will fail without trained people and robust record keeping backing them up. Building an effective valve maintenance program requires investment in your team and your data systems.
Employee Training
Provide regular hands-on training for maintenance staff covering:
- Valve identification and tagging systems
- Safe isolation and lockout/tagout procedures
- Basic inspection and repair techniques for different valve types
- Proper use of torque wrenches and specialty tools
- Recognition of wear patterns and valve failure modes
Update training material and content at least annually, to incorporate lessons learned, new equipment, and evolving best practices. Have technicians work alongside experienced mentors when servicing critical valves for the first time.
Valve Registers
A valve register is the source of truth for your valve maintenance program. Modern CMMS (Computerized Maintenance Management System) platforms can automate scheduling based on time or valve cycle counts. A comprehensive valve register should include:
- Valve tag numbers along with plant location or process descriptions
- Valve service (steam, water, chemical, etc.)
- Valve type and size
- Criticality rating
- Last inspection date, including any findings
- Last maintenance date, including any upgrades or repairs
- Test data (hydrostatic, functional)
- Installation, service, refurbishment, and planned replacement year
Analyzing Maintenance History
Review maintenance records periodically to identify patterns. If you’re replacing valve packing on the same valve every six months, something is wrong, perhaps incorrect material selection, excessive pressure or temperature, or misalignment. Data driven analysis may reveal trends and recurring issues, helping you drive design, process, or operational improvements.
Integration with Broader Programs
Connect valve maintenance data with plant reliability programs, control systems and instrumentation. Connecting valves across different areas helps identify systemic issues. Track valves which have been refurbished, and their subsequent performance.
Modern trends include predictive analytics using vibration sensors and acoustic monitoring, and IoT sensors enabling real-time monitoring of valve pressure and position. These technologies may help reduce unplanned shutdowns by up to 50% in well-implemented predictive maintenance programs.
Summary and Next Steps
Regular, thorough valve maintenance is a fundamental responsibility for anyone managing industrial plants, building infrastructure, or process equipment. The benefits are clear and measurable. Well-maintained valves deliver operational reliability, extended service life, enhanced safety, environmental compliance, and significant cost savings.
The next step is practical. Create or update your own valve maintenance checklist and procedures, tailored to your site or project's particular valve types, criticality levels, and risk profile. Use this guide as a starting point, but customize based on your specific equipment and regulatory environment. For deeper understanding, explore topics like control valve diagnostics, predictive maintenance using vibration or acoustic monitoring, and detailed manufacturer manuals and documentation for your specific valves.
Schedule your next facility-wide valve walkdown and training session. Gather your team, distribute responsibilities, and embed these basics into your routine practice. The valves in your plant work silently every day to ensure optimal performance. It's your job to ensure that they keep doing so reliably for years to come.
With technical expertise and reliable customer support featuring as a hallmark of our 60 year legacy, we can definitely help with your valve maintenance needs. If you’d like to replace a troublesome valve, or if you're not sure which valve is the best fit for your project requirements, get in touch with ValveMan now, for expert assistance and advice.

Mark Trainer, a Navy Veteran Aviation Electronics Technician and an authority in the valve industry, brings over 40 years of experience in process valves and controls to his role as an Outside Sales Representative for ValveMan.com and FS Welsford Company. His profound knowledge of valve types and control loops, coupled with his ability to provide strategic solutions, has earned him a reputation for reliability and professionalism. Mark's unwavering commitment to customer service and his ability to navigate complex technical challenges consistently result in successful outcomes, driving growth and delivering outstanding results for both companies.